Vapco Products, Inc.
Safety Data Sheet
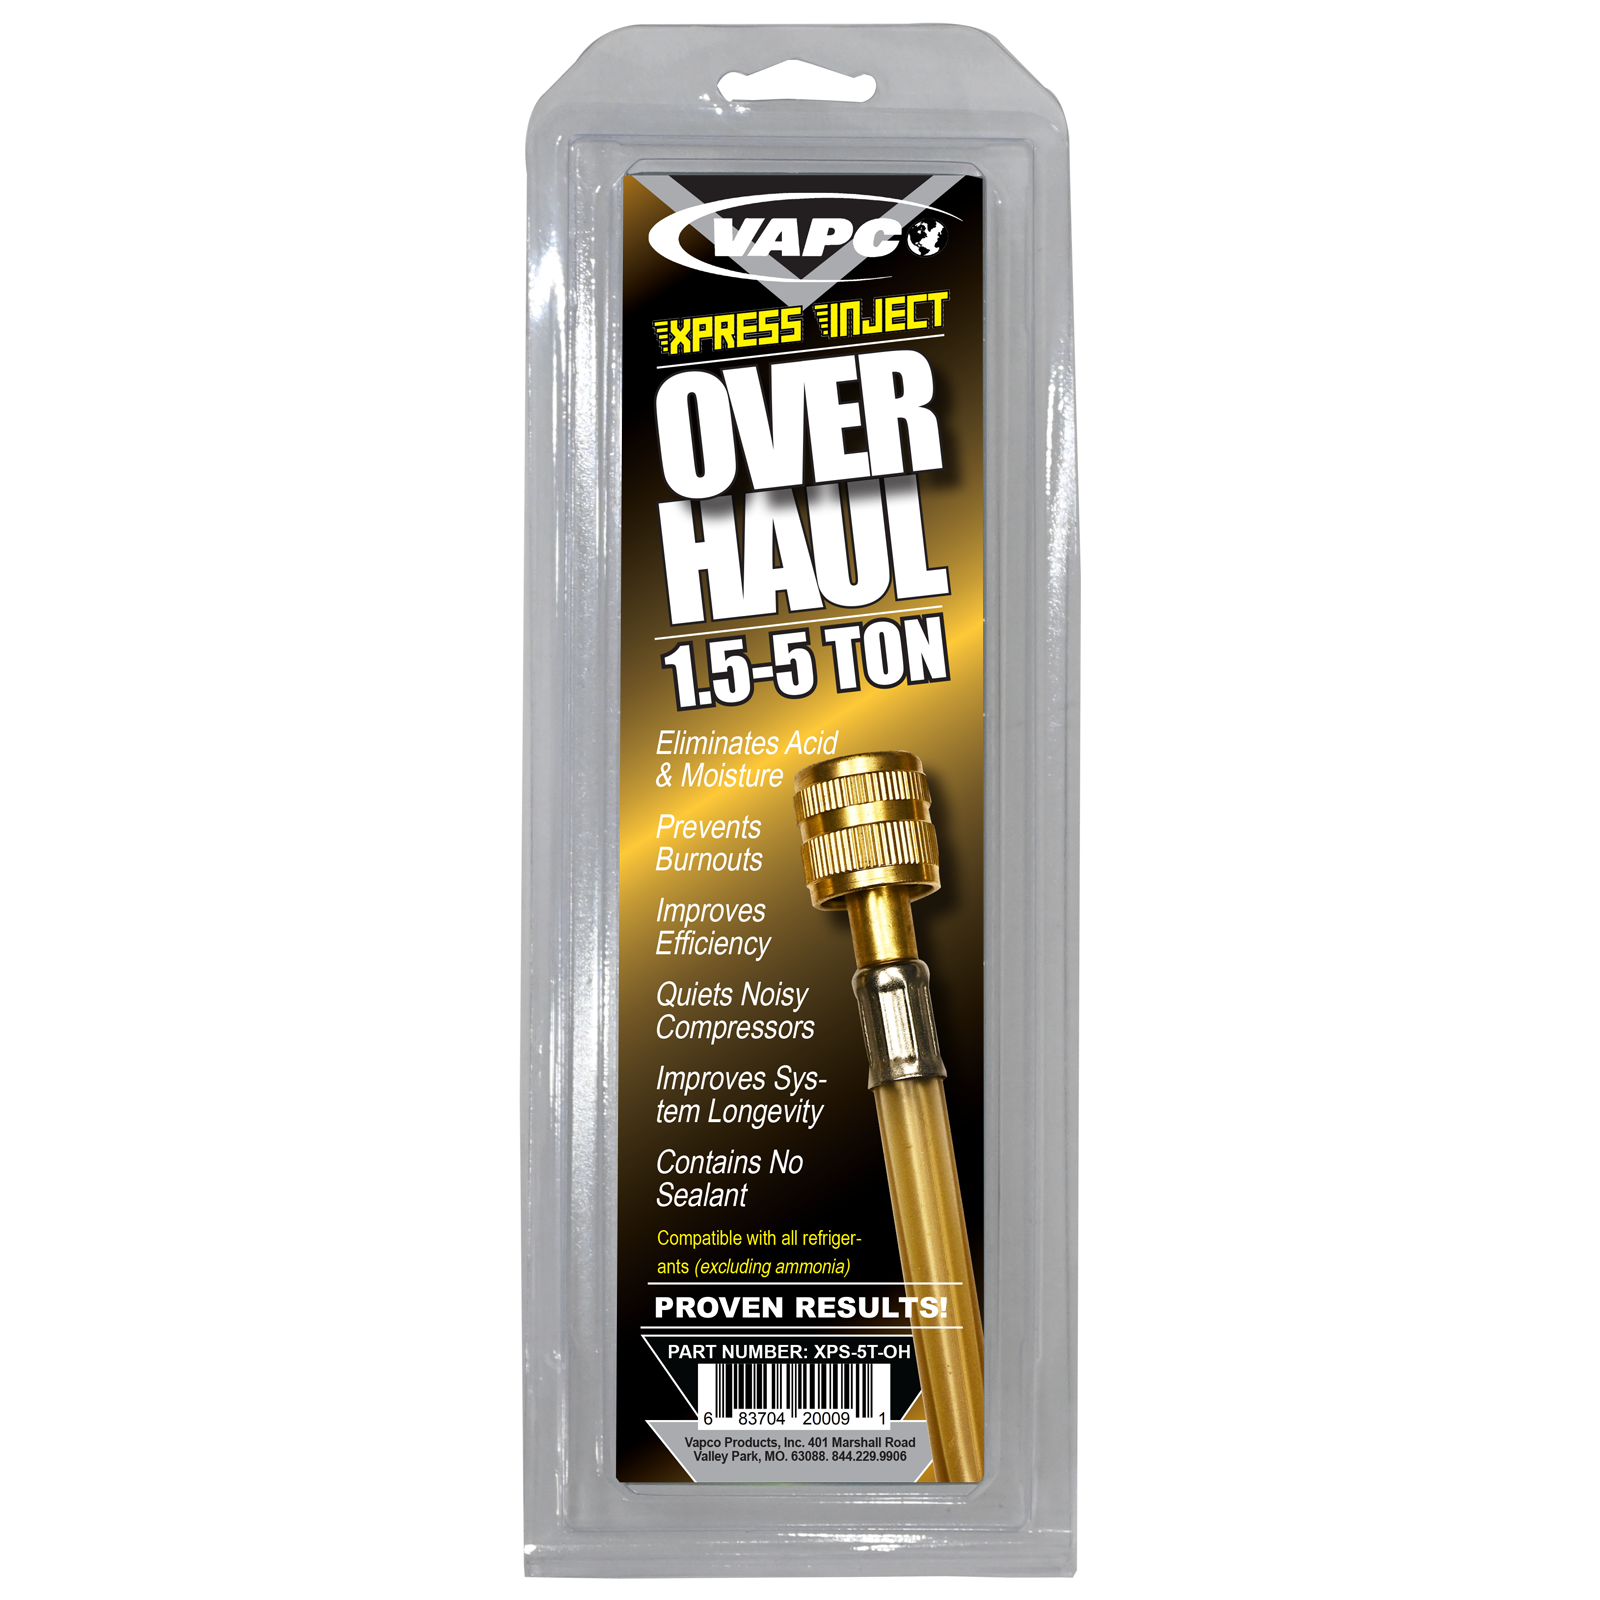
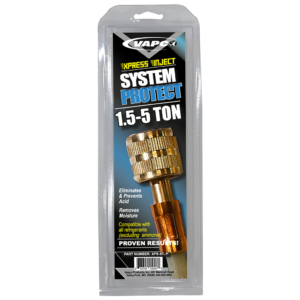
Xpress Inject Overhaul
SECTION 1: Identification
1.1 GHS Product identifier
Product name: Xpress Inject Overhaul
Product number: XPS-5T-OH, XPS-15T-OH, XPS-30T-OH, XPS-60T-OH, XPS-125T-OH
Brand: Vapco
1.3 Recommended use of the chemical and restrictions on use
Performance booster and moisture eliminator for A/C systems
1.4 Supplier’s details
Name: Vapco Products, Inc.
Address: 401 Marshall Road, Valley Park, MO 63088, United States
Telephone: (636) 923-2121
Fax: (636) 923-3002
email: [email protected]
1.5 Emergency phone number
(800) 255-3924
SECTION 2: Hazard identification
2.1 Classification of the substance or mixture
GHS classification in accordance with: OSHA (29 CFR 1910.1200, 2024)
– Aspiration hazard, Cat. 1
– Carcinogenicity, Cat. 1B
– Eye damage/irritation, Cat. 2A
– Flammable liquids, Cat. 2
2.2 GHS label elements, including precautionary statements
Signal word: Danger
Hazard statement(s)
H225 Highly flammable liquid and vapor
H304 May be fatal if swallowed and enters airways
H319 Causes serious eye irritation
H350 May cause cancer
Precautionary statement(s)
P201 Obtain special instructions before use.
P202 Do not handle until all safety precautions have been read and understood.
P210 Keep away from heat/sparks/open flames/hot surfaces. No smoking.
P233 Keep container tightly closed.
P240 Ground/bond container and receiving equipment.
P241 Use explosion-proof electrical/ventilating/lighting/equipment.
P242 Use only non-sparking tools.
P243 Take precautionary measures against static discharge.
P264 Wash hands thoroughly after handling.
P280 Wear protective gloves/protective clothing/eye protection/face protection.
P301+P310 IF SWALLOWED: Immediately call a POISON CENTER/doctor.
P303+P361+P353 IF ON SKIN (or hair): Take off immediately all contaminated clothing. Rinse skin with water/shower.
P305+P351+P338 IF IN EYES: Rinse cautiously with water for several minutes. Remove contact lenses if present and easy to do. Continue rinsing.
P308+P313 IF exposed or concerned: Get medical advice/attention.
P331 Do NOT induce vomiting.
P337+P313 If eye irritation persists: Get medical advice/attention.
P370+P378 In case of fire: Use dry chemical to extinguish.
P403+P235 Store in a well-ventilated place. Keep cool.
P405 Store locked up.
P501 Dispose of contents/container to the specifications of local, regional, national, and international regulations.
2.3 Other hazards which do not result in classification
Exposure may aggravate those with pre-existing eye, skin, or respiratory conditions.
SECTION 3: Composition/information on ingredients
3.2 Mixtures
| Hazardous components |
CAS no. |
Concentration |
| 1. Ethanol (EC no. 200-578-6; Index no. 603-002-00-5) |
64-17-5 |
25 – 75 % (weight) |
| 2. Distillates (petroleum), hydrotreated heavy paraffinic (EC no. 265-157-1; Index no. 649-467-00-8) |
64742-54-7 |
25 – 75 % (weight) |
SECTION 4: First-aid measures
4.1 Description of necessary first-aid measures
General advice: Never give anything by mouth to an unconscious person.If you feel unwell, seek medical advice (show the label where possible).
If inhaled: First, take proper precautions to ensure your own safety before attempting rescue (e.g. wear appropriate respiratory protective equipment, use the buddy system), then remove the exposed person to fresh air.Keep at rest in a position comfortable for breathing. Get medical advice/attention.
In case of skin contact: Immediately drench affected area with water for at least 15 minutes. Remove contaminated clothing immediately.Obtain medical attention if irritation develops or persists.
In case of eye contact: Immediately rinse with water for at least 15 minutes.Remove contact lenses, if present and easy to do. Continue rinsing. Obtain medical attention if irritation develops or persists.
If swallowed: Rinse mouth. Do NOT induce vomiting. Obtain medical attention.
4.2 Most important symptoms/effects, acute and delayed
Symptoms/Injuries: Causes serious eye irritation.
Symptoms/Injuries After Inhalation: May cause respiratory irritation.
Symptoms/Injuries After Skin Contact: May cause skin irritation.
Symptoms/Injuries After Eye Contact: Causes serious eye irritation. Symptoms may include: Redness, pain, swelling, itching, burning, tearing, and blurred vision.
Symptoms/Injuries After Ingestion: May be fatal if swallowed and enters airways.
Chronic Symptoms: Suspected of causing cancer.
4.3 Indication of immediate medical attention and special treatment needed, if necessary
If exposed or concerned, get medical advice and attention.If medical advice is needed, have product container or label at hand.
SECTION 5: Fire-fighting measures
5.1 Suitable extinguishing media
Carbon dioxide (CO2), alcohol-resistant foam, dry chemical, or sand. Use appropriate media for surrounding fire.
5.2 Specific hazards arising from the chemical
Explosion Hazard: Container may explode in heat of fire.Heat may build pressure, rupturing closed containers, spreading fire and increasing risk of burns and injuries.May form flammable/explosive vapor-air mixture. Vapors are heavier than air and may travel considerable distance to an ignition source and flash back to source of vapors.May have flammable/explosive vapor-air mixture.
Reactivity: Hazardous reactions will not occur under normal conditions.
5.3 Special protective actions for fire-fighters
Precautionary Fire Measures: Exercise caution when fighting any chemical fire.
Protection During Firefighting: Do not enter fire area without proper protective equipment, including respiratory protection.Wear NIOSH-approved Self-Contained Breathing Apparatus with a full face piece operated in a positive pressure demand mode with full body protective clothing when fighting fires.
Firefighting Instructions: Use dry chemical, foam, or carbon dioxide (CO2). Do not breathe fumes from fire or vapors from decomposition.Do NOT fight fire when fire reaches containers. Evacuate area. Fight fire remotely due to the risk of explosion.Shut off all sources of ignition. Use water spray or fog for cooling exposed containers.
Hazardous Combustion Products: Carbon oxide(s).May release flammable gases.
SECTION 6: Accidental release measures
6.1 Personal precautions, protective equipment and emergency procedures
General Measures: Do not get in eyes, on skin, or on clothing.Do not breathe vapors, spray, mist, gas. Keep away from heat, hot surfaces, sparks, open flames, and other ignition sources.No smoking.
For Non-Emergency Personnel Protective Equipment: Use appropriate personal protective equipment (PPE).Emergency Procedures: Evacuate unnecessary personnel. Stop leak if safe to do so.
For Emergency Personnel Protective Equipment: Equip cleanup crew with proper protection.Emergency Procedure: Eliminate ignition sources first, then ventilate the area. Evacuate unnecessary personnel, isolate, and ventilate area.Upon arrival at the scene, a first responder is expected to recognize the presence of dangerous goods, protect oneself and the public, secure the area, and call for the assistance of trained personnel as soon as conditions permit.
6.2 Environmental precautions
Prevent entry to sewers and public waters. Avoid release to the environment.
6.3 Methods and materials for containment and cleaning up
For Containment: Ventilate the area.Contain any spills with dikes or absorbents to prevent further migration and entry into sewers or streams.As an immediate precautionary measure, isolate spill or leak area in all directions.
Methods for Cleaning Up: Clean up spills immediately and dispose of waste safely. Eliminate all ignition sources. Ventilate area.Stop the ignition source of the release, if safe to do so.Consider the use of water spray to disperse vapors. Isolate the area until gas has dispersed.Ventilate and gas test area before entering. Take up liquid spill into absorbent material.Transfer spilled material to a suitable container for disposal. Contact competent authorities after a spill.
Waste Disposal: Dispose of in accordance with local, regional, national, and international regulations. Containers may be hazardous when empty.Do not flame cut, braze, or weld. Product should be fully characterized prior to disposal (40 CFR 261).
Reference to other sections
See Section 8 for exposure controls and personal protection and Section 13 for disposal considerations.
SECTION 7: Handling and storage
7.1 Precautions for safe handling
Precautions for Safe Handling: Do not handle until all safety precautions have been read and understood.Avoid contact with skin, eyes and clothing. Do not breathe gas, mist, spray, vapors.Wash hands and other exposed areas with mild soap and water before eating, drinking or smoking and when leaving work.Do not spray on open flame or other ignition source.
Hygiene Measures: Handle in accordance with good industrial hygiene and safety procedures.
Other Precautions: Keep out of reach of children.Follow label instructions. Vapors may collect in low lying areas.
Additional Hazards When Processed: Handle empty containers with care because residual vapors are flammable.
7.2 Conditions for safe storage, including any incompatibilities
Technical Measures: Comply with applicable regulations.Proper grounding procedures to avoid static electricity should be followed.
Storage Conditions: Store in a dry, cool place.Keep only in the original container in a cool, well-ventilated place away from ignition sources. Protect from sunlight.Do not expose to temperatures exceeding 50°C/122°F. Keep/Store away from direct sunlight, extremely high or low temperatures and incompatible materials.Store locked up/in a secure area.
Incompatible Materials: Strong acids, strong bases, strong oxidizers, zinc, attacks some forms of plastic, rubber, and coatings.Brass. Aluminum.
SECTION 8: Exposure controls/personal protection
8.1 Control parameters
1. Ethanol (CAS: 64-17-5)
TWA [Ethyl alcohol] (Inhalation): 1000 ppm; 1880 mg/m3; AU (AU/SWA)
PEL [Ethyl alcohol (Ethanol)] (Inhalation): 1000 ppm; US (US/OSHA) OSHA Annotated Table Z-1, www.osha.gov
PEL [Ethyl alcohol (Ethanol)] (Inhalation): 1900 mg/m3; US (US/OSHA) OSHA Annotated Table Z-1, www.osha.gov
PEL [Ethyl alcohol (Ethanol)] (Inhalation): 1000 ppm; US (Cal/OSHA) OSHA Annotated Table Z-1, www.osha.gov
REL [Ethyl alcohol (Ethanol)] (Inhalation): 1000 ppm; US (NIOSH) OSHA Annotated Table Z-1, www.osha.gov
8.2 Appropriate engineering controls
Emergency eye wash fountains and safety showers should be available in the immediate vicinity of any potential exposure.Ensure adequate ventilation, especially in confined areas. Use explosion-proof equipment. Proper grounding procedures to avoid static electricity should be followed.Use only outdoors or in well-ventilated area. Ensure all local, regional, national, and international regulations are being observed.Obtain special instructions before use. Do not handle until all safety precautions have been read and understood.
8.3 Individual protection measures, such as personal protective equipment (PPE)
Eye/face protection: Chemical safety goggles. Insufficient ventilation: wear respiratory protection.Respiratory protection of the dependent type.
Skin protection: Wear protective gloves and clothing.
Body protection: Wear suitable protective clothing. Wear protective gloves.Chemical resistant materials and fabrics. Wear fire/flame resistant/retardant clothing.
Respiratory protection: Use a NIOSH-approved Self-Containing Breathing Apparatus whenever exposure may exceed established Occupational Exposure Limits.
SECTION 9: Physical and chemical properties
| Physical state |
Liquid |
| Appearance |
Liquid |
| Color |
N/A |
| Odor |
N/D |
| Odor threshold |
N/A |
| Melting point/freezing point |
-114°C (-173°F) |
| Boiling point or initial boiling point and boiling range |
78°C (173°F) |
| Flammability |
N/A |
| Lower and upper explosion limit/flammability limit |
N/D |
| Flash point |
13°C (55°F) |
| Auto-ignition temperature |
363°C (685°F) |
| Decomposition temperature |
N/A |
| pH |
N/A |
| Kinematic viscosity |
N/A |
| Solubility |
N/A |
| Partition coefficient n-octanol/water (log value) |
N/D |
| Vapor pressure |
N/D |
| Evaporation rate |
N/A |
| Density and/or relative density |
0.7893 g/cm3 at 20°C |
| Relative vapor density |
N/A |
SECTION 10: Stability and reactivity
10.1 Reactivity: Hazardous reactions will not occur under normal conditons.
10.2 Chemical stability: Highly flammable liquid and vapor. May form flammable/explosive vapor-air mixture.
10.3 Possibility of hazardous reactions: Hazardous polymerization will not occur.
10.4 Conditions to avoid: Direct sunlight.Extremely high or low temperatures. Open flame. Heat. Sparks. Incompatible materials.
10.5 Incompatible materials: Strong acids, strong bases, strong oxidizers, zinc, attacks some forms of plastic, rubber, and coatings.Brass. Aluminum.
10.6 Hazardous decomposition products: Carbon oxide(s). May release flammable gases.
SECTION 11: Toxicological information
Acute toxicity:
Ethyl alcohol: (64-17-5)
LD50 Oral – Rat – 10,470 mg/kg
LD50 Dermal – Rat – 20 ml/kg
LC50 Inhalation – Rat – 124.7 mg/l – 4 hrs
Skin corrosion/irritation: Not classified.
Serious eye damage/irritation: Causes serious eye irritation.
Respiratory or skin sensitization: Not classified.
Germ cell mutagenicity: Not classified.
Carcinogenicity: May cause cancer.
Reproductive toxicity: Not classified.
Specific target organ toxicity (STOT) – single exposure: Not classified.
Specific target organ toxicity (STOT) – repeated exposure: Not classified.
Aspiration hazard: May be fatal if swallowed and enters airways.
Additional information:
Symptoms/Injuries: Causes serious eye irritation.Symptoms/Injuries After Inhalation: May cause respiratory irritation.Symptoms/Injuries After Skin Contact: May cause skin irritation.Symptoms/Injuries After Eye Contact: Causes serious eye irritation.Symptoms may include: Redness, pain, swelling, itching, burning, tearing, and blurred vision.Symptoms/Injuries After Ingestion: May be fatal if swallowed and enters airways.Chronic Symptoms: None expected under normal conditions of use.
SECTION 12: Ecological information
Toxicity:
Ethyl alcohol: (64-17-5)
LC50 – Oncorhynchus mykiss [static] – 96 hrs
EC50 – Daphnia magna – 9268-14221 mg/l – 48 hrs
LC50 – Pimephales promelas [static] – >100 mg/l – 96 hrs
Distillates, petroleum, hydro-treated heavy paraffinic: (64742-54-7)
LC50 – Oncorhynchus mykiss – >5000 mg/l – 96 hrs
EC50 – Daphnia magna – >1000 mg/l – 48 hrs
Persistence and degradability: No data available.
Bioaccumulative potential: No data available.
Mobility in soil: No data available.
Other adverse effects: Avoid release to the environment.
SECTION 13: Disposal considerations
Disposal methods
Product disposal: Contact a licensed professional waste disposal service to dispose of this material.Burn in a chemical incinerator equipped with an afterburner and scrubber but exert care in igniting as this material is highly flammable.Offer surplus and non-recyclable solutions to a licensed disposal company.
Packaging disposal: Dispose of as unused product.
Other disposal recommendations: Container may remain hazardous when empty. Continue to observe all precautions. Do not puncture or incinerate container.Product should be fully characterized prior to disposal. Dispose of contents/container in accordance with local, regional, national, and international regulations.Do not pierce or burn, even after use.
SECTION 14: Transport information
DOT (US): UN Number: ID8000; Class: 9; Packing Group: N/A; Proper Shipping Name: Consumer commodity
IMDG: UN Number: ID8000; Class: 9; Packing Group: II; EMS Number: F-E; Proper Shipping Name: Consumer commodity
IATA: UN Number: ID8000; Class: 9; Packing Group: II; Proper Shipping Name: Consumer commodity
SECTION 15: Regulatory information
15.1 Safety, health and environmental regulations specific for the product in question
California Proposition 65 Chemicals List: WARNING: This product contains chemicals known to the State of California to cause cancer.WARNING: This product contains chemicals known to the State of California to cause birth defects.
Massachusetts Right To Know Components (105 CMR 670): Chemical name: DENATURED ALCOHOL; CAS number: 64-17-5
New Jersey Right To Know Components: Common name: ETHYL ALCOHOL; CAS number: 64-17-5
Pennsylvania Right To Know Components: Chemical name: ETHANOL; CAS number: 64-17-5
SARA 311/312 Hazards: Immediate (Acute) Health Hazard, Fire Hazard, Delayed (Chronic) Health Hazard,
US EPA TSCA public inventory: Chemical name: Ethanol; CAS number: 64-17-5; Chemical name: Distillates (petroleum), hydrotreated heavy paraffinic; CAS number: 64742-54-7
SECTION 16: Other information
N/A = Not applicable; N/D = Not determined
16.1 Further information/disclaimer: To the best of our knowledge, information contained herein is accurate.However there is no assumption of liability for the accuracy or completeness of the information contained herein.Final determination of suitability of any material is the sole responsibility of the user.All materials may present unknown hazards and should be used with caution.Although certain hazards are described herein, we cannot guarantee that these are the only hazard which exists.The information contained in this SDS was obtained from current and reliable sources;however, the data is provided without warranty, expressed or implied, regarding its correctness or accuracy.Since the conditions of handling, storage and disposal of this product are beyond the control of the manufacturer, the manufacturer will not be responsible for loss, injury, or expense arising out of the products improper use.No warranty, expressed or inferred, regarding the product described in this SDS shall be created or inferred by any statement in this SDS.Various government agencies may have specific regulations regarding the transportation, handling, storage, use, or disposal of this product which may not be covered by this SDS.The user is responsible for full compliance.
16.2 Preparation information: Prepared by: Jessica Wilson; Date prepared: 1/23/2026